Thursday, January 1, 2009

Bonne Année!

Demons aren't bound by physics. If you take the long view, the universe is just something small and round, like those waterfilled balls which produce a miniature snowstorm when you shake them.

— Good Omens


Things have been... busy. Crazy-busy-until-you-think-you-want-to-cry busy, actually. At the moment, I consider myself the center of the waterfilled ball (so to speak). Of late, there has been no:

1. rest
2. relaxation
3. spare time
4. blogging (as is evident)

Sorry.

I'm still kind of burned out, but I had two nice desserts that I actually managed to photograph. The first is a cranberry tea cake from the Moosewood Cookbook, which I came across in my large collection of vegetarian cookbooks. I don't have much to say—not so much because it was uninteresting but more because my one remaining brain cell is on strike. But it was good. You should try it.


Cranberry Tea Cake
2 cups fresh or frozen cranberries
½ cup brown sugar
½ cup almonds, finely chopped
2 teaspoons cinnamon
¼ teaspoon nutmeg
½ cup butter
1 cup sugar
1 teaspoon vanilla
1 cup sour cream
2 eggs, beaten
2 cups unbleached flour
1 teaspoon baking soda
1 teaspoon baking powder
1 pinch salt


Coarsely chop cranberries. Combine with brown sugar, almonds, cinnamon and nutmeg; set to the side. Cream butter and sugar. Add vanilla, sour cream, and eggs; mix thoroughly.

Preheat oven to 350°F.

Sift together flour, baking soda, baking powder, and salt. Stir into egg mixture just until moistened.

Pour ½ of batter into greased Bundt pan or 8" round cake pan. Spread ½ of cranberry mixture over the top. Repeat with remaining batter and cranberries.

Bake 50-60 minutes, or until a tester comes out clean. Remove from pan and cool on rack. Dust with powdered sugar, if desired.


The second recipe was a nice surprise for my 2009 recipe box. I like oatmeal raisin cookies, but it seems that nobody else does. I've been wanting them for a while, and finally cracked when I saw the recipe for these cookies from Schrafft's. My only reservation was the prospect of eating them all myself, which seemed excessive even for the holidays. But these... they were fantastic. They were awesome. They were even better than I remembered. A "superior" oatmeal raisin cookie. I think I only got one before they disappeared.


Schraftt's Oatmeal Raisin Cookies
1½ cups old-fashioned or quick-cooking rolled oats (not instant oatmeal)
1¼ cups all-purpose flour
½ teaspoon baking powder
½ teaspoon baking soda
½ teaspoon salt
1 teaspoon ground cinnamon
½ teaspoon ground allspice
¼ pound (1 stick) unsalted butter, softened
¾ cup sugar
¼ cup packed dark brown sugar
2 eggs
1 teaspoon vanilla extract
¼ cup whole or lowfat milk
1 cup raisins
1 cup chopped walnuts


Preheat the oven to 350 degrees. Lightly grease 2 cookie sheets.

Whisk together the rolled oats, flour, baking powder, baking soda, salt, cinnamon, and allspice in a large bowl.

Using an electric mixer, cream the butter with the two sugars in a large bowl until smooth. Add the eggs and vanilla and beat until light and well blended. With the mixer on low speed, add the oat mixture and the milk, beating until well combined and a stiff dough forms. Stir in the raisins and nuts. Refrigerate the dough 30 minutes—or up to 12 hours if not using immediately. Drop the dough by heaping tablespoonfuls onto the prepared cookie sheets, spacing about 2 inches apart. Press the tops gently to flatten very slightly.

Bake until the edges are brown and the centers are still soft and puffy, about 11 to 14 minutes. Cool on wire racks. Store in a covered container for up to 3 days or freeze.


Happy New Year!

Wednesday, December 10, 2008

My Favorite Racist Cookie

Here, take a cookie. I promise, by the time you're done eating it, you'll feel right as rain.

— The Oracle (The Matrix)


These cookies and I have a troubled relationship. They were one of the first things G asked me to make, but one of the cookies that took longest to get right. As they sit now, they rate a 9 on the official cookie rating scale, which I say with some pride. But we both agree, there's still work to be done.

Black and white cookies are one of those really regional things("pop":Midwest as having-eaten-a-black-and-white-cookie:New York), though I personally feel they get short shrift. I'd never even heard of them before we met. They're really fantastic though—I really don't understand why they're not more widely appreciated. (And no, some episode of Seinfeld doesn't count as national exposure.)

The recipe I use is one of the few I can really call my own. I've played with it a lot in an attempt to mimic the cookie of his childhood—or more likely the cookie that he's created in his imagination as the cookie of his childhood. My initial cookies were too thick, didn't have the right flavor, and lacked sufficient size. It wasn't until I saw a one in NYC for the first time that I understood quite how large these are expected to be. And one of the most important steps forward came when he admitted that he just doesn't like the white side very much, which led to the 60% black and 40% white cookie.

Of course, who are we kidding here? It's not black and white. More like brown and beige. But I guess the brown and beige cookie doesn't roll off the tongue quite the same way.


Black and White Cookies
1¼ cups all-purpose flour
½ teaspoon baking soda
½ teaspoon salt
1 teaspoon lemon juice plus enough milk to make 1/3 cup
½ teaspoon vanilla
1/3 cup (5 1/3 tablespoons) unsalted butter, softened
½ cup granulated sugar
1 large egg
3 cups confectioners' sugar, sifted
2 tablespoons light corn syrup, plus more if needed
2 ounces bittersweet chocolate, melted


Whisk together flour, baking soda, and salt in a bowl. Stir together milk and vanilla in a cup.

Beat together butter and sugar in a large bowl with an electric mixer until pale and fluffy, about 3 minutes, then add egg, beating until combined well. Mix in flour mixture and buttermilk mixture alternately in batches at low speed or by hand (scraping down side of bowl occasionally), beginning and ending with flour mixture. Mix until smooth and refrigerate at least 15 minutes. While waiting, preheat oven to 350°F.

Spoon batter onto a large, greased baking sheet. The cookies should be quite large—one recipe will make about six cookies. Using fingers, spread cookies until flat and circular. They do not need to be extremely thin, but will puff up a fair bit in the oven. Bake in middle of oven until tops are puffed and pale golden, and cookies spring back when touched, 15 to 17 minutes. Transfer with a metal spatula to a rack. When completely cool, place cookies in plastic bag and leave in the freezer until hard. Return cookies to rack, flat underside facing up.

Combine confectioners’ sugar, corn syrup, and enough hot water until you have a thick paste. In a small saucepan over low heat, whisk until smooth and fairly thin. Working quickly, ice the flat underside of a bit less than half of each cookie (it will be necessary to continually adjust heat and liquid content). Return cookies to rack to drip, placing paper towels beneath to catch any drips. Combine chocolate (as well as any needed water or corn syrup) with remaining icing ingredients to make a thicker chocolate mixture and cover remaining part of each cookie.

Makes 6 large cookies.


Friday, November 28, 2008

The Ugly Side of Deliciousness

It can hardly be a coincidence that no language on earth has ever produced the expression "As pretty as an airport." Airports are ugly. Some are very ugly. Some attain a degree of ugliness that can only be the result of a special effort. This ugliness arises because airports are full of people who are tired, cross, and have just discovered that their luggage has landed in Murmansk (Murmansk airport is the only exception of this otherwise infallible rule), and architects have on the whole tried to reflect this in their designs.

—Douglas Adams (The Long Dark Tea-Time of the Soul)


Things have been busy. Very busy. Of course, I take comfort in the fact that I am the only person in the world who finds the holiday season somewhat frantic. It makes my heart all warm and fuzzy to imagine everyone else just resting by the fire, without a care in the world. Santa bringing presents and elves fixing all the decorations, to avoid any of that holiday stress that was the bane of past generations. Sadly, my elves must have been lost in the mail.

In any event, I apologize for the lack of posts lately. But lack of posts does not imply lack of cooking—by any stretch of the imagination. Thanksgiving and no cooking? Are you joking?

I wanted to share one of my personal favorites from Thanksgiving (also one of the few that I was able to photograph). Unfortunately, it photographed rather badly. I was in a hurry, and it wasn't that pretty to begin with. But hot damn, it was fantastic.

I found the recipe here a long time ago, and have been waiting for an opportunity excuse to make it. My only regret is that I waited so long. Well, that and the fact that it turned out so ugly. But the beauty is on the inside. Or more accurately, the beauty when it's inside my stomach.


Pumpkin Cheesecake (stolen from The Joy of Baking)
1½ cup (150 grams) graham cracker crumbs
¾ cups (75 grams) finely ground ginger cookies, homemade or store bought
1½ tablespoon (22.5 grams) granulated white sugar
6-7½ tablespoons (84-90 grams) unsalted butter, melted

2/3 cup (145 grams) light brown sugar
½ teaspoon ground cinnamon
¼ teaspoon ground ginger
1/8 teaspoon ground cloves
1/8 teaspoon ground nutmeg
¼ teaspoon salt
1 pound (454 grams) cream cheese, room temperature
3 large eggs
1 teaspoon pure vanilla extract
1 cup pure pumpkin puree (canned or homemade)

1 cup sour cream
1 teaspoon pure vanilla extract or vanilla bean paste
¼ cup (50 grams) granulated sugar


Preheat oven to 350˚F and place the oven rack in the center of the oven. Butter an 8-inch springform pan.

In a medium sized bowl combine the graham cracker crumbs, finely ground ginger snap cookies, sugar, and melted butter. Pour the mixture onto the bottom of the prepared springform pan. Cover with plastic wrap to prevent crust from sticking to fingers; press crust into bottom of tin. Using a flat-bottomed measuring cup (or another object with a similar shape), lightly pound graham crackers flat. The crust should begin to move up the sides of the tin as the bottom becomes thinner. Continue pounding until thickness is roughly even throughout tin, pressing sides of tin as needed to ensure that crust sticks together and does not run over sides of tin. Cover and refrigerate while you make the cheesecake filling.

In a separate bowl, stir to combine the sugar, cinnamon, ginger, cloves, nutmeg, and salt. In the bowl of your electric mixer (or with a hand mixer), on low speed, beat the cream cheese until smooth (about 2 minutes). Gradually add the sugar mixture and beat until creamy and smooth (1 to 2 minutes). Add the eggs, one at a time, beating well (about 30 seconds) after each addition. Scrape down the sides of the bowl and beat in the vanilla extract and pumpkin puree.

Pour the filling over the chilled ginger crust and place the spring form pan on a baking sheet to catch any drips. Place a cake pan, filled halfway with hot water, on the bottom shelf of your oven to moisten the air. Bake the cheesecake for 30 minutes and then reduce the oven temperature to 325˚F and continue to bake the cheesecake for another 10 - 20 minutes, or until the edges of the cheesecake are puffed but the center is still wet and jiggles when you gently shake the pan.

Meanwhile whisk together the sour cream, vanilla extract and sugar. Pour the sour cream mixture over the top of the baked cheesecake and rotate the pan slightly to evenly distribute the topping. Return the cheesecake to the oven and bake about 8 minutes to set the topping. Remove from oven and place on a wire rack to cool. Loosen the cake from the pan by running a sharp knife around the inside edge (this will help prevent the cake from cracking). Then place a piece of aluminum foil over the top of the pan so the cheesecake will cool slowly. When completely cooled, cover and refrigerate at least ten hours, preferably overnight, before serving.

Serves 10-12 people.

Saturday, November 22, 2008

Notes on the Vanilla Bean

You want some advice? Well, here's a piece of advice from me to you: lay off the caramels.

— Roxie Hart (Chicago)


Vanilla beans are ridiculous. Just ridiculous. You want me to pay how much for two beans? No, seriously. It's just two beans. How much again? I could buy enough vanilla extract for all the cakes in a ten mile radius for the same price.

Sadly, vanilla beans are also addicting. It would be much easier for everyone involved if they could please just not be any good, but they're kind of fantastic. I love almost anything when made with vanilla beans. Mint-coconut cream cheese? I'd rather die. But tell me that it's made with vanilla beans, and next thing you know it's in my mouth.

That having been said, I'm more than a little reticent to use them. I still have a bean and a half, and I'm clinging on for dear life. Only every oh-so-rare once in a while—for example when it comes to caramels—I'm willing to dig into my stash.

I loves me some caramel.

I tried making these caramels, and (while they were delicious) I must have done something wrong because they were the sort of things one bites into only after having moved all stocks into dentistry.

Mostly undeterred, I rolled up my proverbial sleeves again. And I must say, I'm extremely glad I did. G doesn't like the results quite as much as raspberry truffles, but I beg to differ. And no matter who you ask, they can't be that bad... they're disappearing faster than can be good for anyone's arteries.

Me: "How about we take some caramels to C's on Monday?"
G: Blank stare. "Very funny." [pause] "I'll kill you if you try." [pause] "But I love you."


Chocolate-Covered Caramels (adapted from the CIA)
1¾ cups sugar
1 cup light corn syrup
1 twelve-ounce can evaporated milk
½ vanilla bean, split lengthwise
2/3 cup heavy cream
1 tablespoon unsalted butter
1 teaspoon fleur de sel
1 pound milk chocolate

Flourless cooking spray for greasing


Lightly coat an 8-inch square baking pan with cooking spray. Cut two 8 x 16-inch rectangles of parchment paper. Lay one strip of the parchment in the baking pan, pressing it to the bottom and sides. Lightly coat the parchment with cooking spray. Lay the second parchment rectangle across the pan in the opposite direction to form a cross. Press the parchment to the bottom and sides of the pan and lightly coat with cooking spray. You should have a few inches of paper hanging over each side of the pan.

Combine the sugar, evaporated milk, vanilla bean, and cream in a 4-quart heavy-bottomed saucepan. Bring the mixture to a boil over medium heat, stirring constantly. Once the mixture begins to boil, add the corn syrup and continue to stir. Cook the caramel until it reaches 230˚F on a candy thermometer, and then add the butter and the salt. Continue cooking and stirring until you reach 238˚F; immediately pour into the prepared pan – do not scrape the caramel from the bottom of the pan. Remove the vanilla bean with the tip of a knife.

Cool to room temperature. Using the excess parchment paper as handles, lift the caramel slab from the pan and place onto a cutting board. Cut the caramel into squares with a large sharp knife. If the caramel sticks to the knife when cutting, lightly coat the blade with vegetable oil.

Heat two-thirds of chocolate in a metal bowl above simmering water, to 105°F. Add remaining third and stir vigorously until chocolate is cooled, 95°F. If chocolate melts completely above 95°F, add more unmelted chocolate and continue stirring. If chocolate drops below 95°F without fully melting, return briefly to heat. Chocolate should achieve a nice shine if it is properly tempered.

Drop caramel squares, one at a time, in tempered chocolate. Using two spoons, cover caramel in chocolate. Remove caramel from chocolate with and drain off excess. Carefully return each caramel to baking sheet. Chocolate should harden at room temperature.

Makes 64 1-inch caramels.


Thursday, November 20, 2008

A Cake By Any Other Name...

On a stop light green means go and yellow means slow down, but on a banana it's just the opposite. Green means hold on, yellow means go ahead, and red means 'where the f&%# did you get that banana at'?

— Mitch Hedberg


Ha. "Bread". Banana bread is bread in the same way that sweetbreads are breads. Or sweetmeats are meats. We're not even talking about chances here. This snowball doesn't have a certain probability of surviving hell. This snowball is already a puddle in the fiery depths.

And since there's no use prevaricating about the bush (as Wallace likes to say), I choose to dive in head first. Bread? Bah. Would you like some chocolate chips with that cake you're eating? Why, yes, thank you. I think I would.

But bread or not, banana bread is one of my favorite treats. I was reading about using extra-black bananas the other day, and it sparked a great craving for banana bread. Soft, warm, and gooey, with lots of chocolate chips. Mmm. This particular recipe was a staple with my dorm mates in college. I can personally recommend it as one of the finest known methods for surviving late-night problem sets.


Chocolate Chip Banana Bread
2½ cups flour
2 teaspoon baking soda
1 cup salted butter, at room temperature
2 cups sugar
2 cups mashed ripe banana (4 large bananas)
4 eggs
2-3 generous cups chocolate chips


Preheat an oven to 350°F. Grease and flour 2 medium (8½-inch) loaf pans.

In a medium bowl, stir and toss together the flour and baking soda. Set aside. In a large bowl, beat together the butter and sugar until blended; a hand-held mixer is useful for this step. Beat in the banana, then beat in the eggs until completely mixed. Don't worry if the mixture looks curdled. Add the combined dry ingredients and stir until just blended, then stir in the chocolate chips.

Spread evenly in the 2 prepared pans. Bake until a thin wooden skewer or toothpick inserted in the center of a loaf comes out clean, 55-65 minutes. Let cool in the pans for about 10 minutes, and serve!

Makes 2 medium loaves; about 20 slices.


Saturday, November 15, 2008

Thieving Again

When I was a kid, I used to pray every night for a new bicycle. Then I realized that the Lord, in his wisdom, doesn't work that way. So I just stole one and asked him to forgive me.

— Emo Phillips


In the Thanksgiving spirit, I thought I'd participate in some good old-fashioned thievery this week. I was always told there's nothing like a little holiday spirit. Right? Right.

I had some leftover icing from my last cake, and it was feeling lonely. And a muffin has to look out for her icing. I'm sure you understand. I may have done some things I'm not proud of, but wouldn't you have done the same? It was in the name of love. Well, that and not throwing away perfectly good buttercream.


My acts of larceny number as follows:

1. A delicious yellow cake recipe, last seen in the company of Bakerella.

2. These fantastic turkeys from The Hungry Housewife.


The results sentence? Not bad. Not bad at all. I probably owe those from whom the recipes were stolen a cupcake.


Thanksgiving Cupcakes
48 double stuff Oreos
144 candy corns
24 malted milk balls
24 miniature Reese's cups
White, red, orange and black royal icing (or purchased decorating frosting)

3 large egg yolks (56 grams)
¼ cup plus 2 tablespoons sugar (75 grams)
¼ cups corn syrup (82 grams)
1 cup unsalted butter (227 grams)
1 tablespoon Godiva chocolate liqueur (14 grams)
3 ounces chocolate, preferably bittersweet

1 cup (2 sticks) of butter (room temperature)
2 cups of sugar
4 eggs (room temperature)
3 cups of sifted self-rising flour (White Lily)
1 cup of whole milk (room temperature)
1 teaspoon pure vanilla extract
½ teaspoon butter flavoring


Using white icing, attach unwrapped a Reese's cup to one face of an Oreo, placing it off-center such that it comes to the edge of the cookie. Affix a malted milk ball to the same cookie such that it too comes to the edge of the cookie, but at a point 180° around the cookie. (In other words, the points at which the peanut butter cup and the malted milk ball touch the edges of the cookie fall on a line that bisects the cookie.) Repeat until half of Oreos are assembled this way. Allow icing to dry.

Apply icing between the two faces of the cookies, where the candy corns will be placed for feathers. (These should be the cookies to which candy is already attached.) The icing will go in an arc around the malted milk ball that almost forms a semi-circle. Press five candy corns into the icing and Oreo filling, spacing evenly. Repeat for remaining cookies.

Dot each malted milk ball twice with white icing, for eyes. Make a third line down the middle, thicker at the top than the bottom (an upside-down isosceles triangle), for the nose. Use two dark dots of icing coloring on top of the eyes to make pupils. Again, allow to dry.

Lay down all the remaining (plain) Oreos and attach a decorated Oreo to each, perpendicularly. The turkey should now be standing up. Be sure to leave enough space for one candy corn "tail feather" on the back, and for iced feet on the front.

Using orange icing, make two feet for each turkey (at the base of the Reese's candy). Use red icing, just under the nose, to make the snood. Allow to dry.


Place 1 cup butter on counter (it must be soft when used). Heave ready a greased 1-cup heatproof glass measuring cup.

Using an electric mixer, beat egg yolks until light in color. Meanwhile, combine sugar and corn syrup in a nonstick saucepan. Heat, constantly stirring, until mixture is bubbling throughout. Immediately pour into heatproof cup.

Turn the mixer off and pour a small amount of sugar in with egg yolks. Immediately beat for five seconds at high speed. Turn mixer off and add larger amount; beat again. Repeat until all sugar mixture is incorporated. Use a spatula to get all the sugar out of the heatproof cup. Continue beating until completely cool.

Gradually beat in butter, liqueur, and chocolate. Place in an airtight bowl. Buttercream will keep for 6 hours at room temperature, or a week in the refrigerator.


Preheat oven to 350°F. Grease and flour 24 muffin tins, or line with muffin cups.

Using a mixer, cream butter until fluffy. Add sugar and continue to cream for about 7 minutes. Add eggs, one at a time. Beat well after each egg is added. Add flour and milk (alternating to creamed mixture), beginning and ending with flour. Add vanilla and butter flavoring to mix; until just mixed.

Divide batter equally into muffin tins. Hold each tin about three inches above your counter and carefully drop flat onto counter several times to ensure release of any air bubbles. Bake for 25 - 30 minutes (depending on your oven) until done. Cool in pans for 5 - 10 minutes.

Remove and immediately wrap each cupcakes in plastic wrap to seal in moisture. Cool completely on wire racks.

Ice cupcakes with buttercream. Place one turkey on top of each cupcake.


Monday, November 10, 2008

Leftovers, Auditions, and Other Musings

Shrek: NO! LAYERS! Onions have layers. Ogres have layers. Onions have layers...you get it? We both have layers.
Donkey: Oh, you both have layers. [sniffs onion again and winces] You know, not everybody likes onions. [pause] Cakes! Everybody loves cakes! Cakes have layers!


— Shrek


Leftovers and I need to talk. Our relationship is strained, at best. To be fair, it's probably my fault. I need to work on my leftovers communication skills. "Couldn't we just dress up you a little? You'd look just as pretty as before..." "No! Go away! I'm not coming out!" G doesn't like them much, and I often can't eat them. I do try to fix them up so they'll be more palatable, but.. Well, I'm sure you can see where this is going.

Anyway, I had some leftover fondant in the pantry, which seemed about as friendly as leftovers can get. I've never really played with fondant, and I figured it might be a good time to experiment.

Step one: make something to go underneath the fondant. I pondered this for a bit, and decided to kill two bird one stone (in a less violent, proverbial way). Because little known to you, I have a culinary quest. It is a great quest, and instills fear in the hearts of the mighty. At least, I like to think so, because it certainly instills fear in my heart. I have tried before, and failed. I will probably fail several more times before I get it right. But I must be brave. I like to think of myself and my whisk as a stoic combination.

My goal is to make a seven-layer cake. And not just any seven-layer cake. A seven-layer cake like the one G's mother used to by from the fancy Swiss bakery down the street. I made Dobostorte, but that was definitely wrong. So my next attempt will be Prinzregententorte. I have a recipe, but I also have a sneaking suspicion that what he wants is really a house variation of Prinzregententorte. So I may have to figure out the components, piece by piece.

So, then, why not hold Prinzregententorte auditions underneath my fondant? (Said I to myself.) And I did. I must say an awful lot of egg yolks were involved, but it was generally well-received. The buttercream is a keeper, the cake not so much. Not that there's anything really wrong with it, just that we've concluded he wants a sponge cake and not a butter cake.

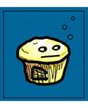
Step two: What do you do with your fondant once it's on top? This question (perhaps to my detriment) I pondered while running. Food sounded really good. Really, really good. The first thing that came to mind was Thanksgiving, so the next thing was a cornucopia. And thus my cake was born. It didn't turn out very well, but hopefully I learned from my mistakes.

Hopefully.


Yellow Cake with Chocolate Buttercream and Fondant (from The Cake Bible)
1 tablespoon gelatin (10 grams)
3 tablespoons water (45 grams)
½ cup corn syrup (164 grams)
1 tablespoon glycerine (18 grams)
2 tablespoons solid white shortening (24 grams)
8 cups powdered sugar (920 grams)
Coloring

3 large egg yolks (56 grams)
¼ cup plus 2 tablespoons sugar (75 grams)
¼ cups corn syrup (82 grams)
1 cup unsalted butter (227 grams)
1 tablespoon Godiva chocolate liqueur (14 grams)
3 ounces chocolate, preferably bittersweet

6 large egg yolks (112 grams)
1 cup milk (242 grams)
2¼ teaspoons vanilla (9 grams)
3 cups sifted cake flour (300 grams)
1½ cups sugar (300 grams)
1 tablespoon plus 1 teaspoon baking powder (19.5 grams)
¾ teaspoon salt (5 grams)
12 tablespoons unsalted butter (170 grams)


Place several cups of water on the stove and bring to a moderate simmer.

Pour 3 tablespoons water into a heatproof measuring cup, and sprinkle gelatin on top. Allow mixture to sit for five minutes. Pour hot water into large pan, and place measuring cup in the water bath. Stir gelatin, until it melts and no clumps are visible.

Add corn syrup, glycerine, and shortening. Stir until everything is melted, as much as six or seven minutes. The hot water bath may need to be replaced (or reheated) if it becomes too cold.

Measure out powdered sugar into extra-large bowl. Pour syrup over sugar. Lightly grease a wooden spoon, and stir sugar and syrup thoroughly. When no more sugar can be incorporated with the spoon, lightly grease hands and knead fondant in bowl. Try to incorporate all the powdered sugar into a ball of fondant (this may take a while). Turn out fondant onto a smooth, clean surface. Knead several more times to form a smooth ball. If fondant is sticky, add a bit more powdered sugar. If you are unable to incorporate all the sugar, add a few drops of water.

Wrap ball tightly with plastic wrap, and place in airtight container. Let sit at least three hours before rolling out. Fondant will keep a month at room temperature, or indefinitely in the freezer.

Place 1 cup butter on counter (it must be soft when used). Heave ready a greased 1-cup heatproof glass measuring cup.

Using an electric mixer, beat egg yolks until light in color. Meanwhile, combine sugar and corn syrup in a nonstick saucepan. Heat, constantly stirring, until mixture is bubbling throughout. Immediately pour into heatproof cup.

Turn the mixer off and pour a small amount of sugar in with egg yolks. Immediately beat for five seconds at high speed. Turn mixer off and add larger amount; beat again. Repeat until all sugar mixture is incorporated. Use a spatula to get all the sugar out of the heatproof cup. Continue beating until completely cool.

Gradually beat in butter, liqueur, and chocolate. Place in an airtight bowl. Buttercream will keep for 6 hours at room temperature, or a week in the refrigerator.

Butter two 9-inch cake pans. Line the bottom with parchment or waxed paper, then butter again and flour. Preheat oven to 350°F.

In a medium mixing bowl, combine yolks, ¼ cup milk, and vanilla. Place dry ingredients in bowl of electric mixer. Beat 30 seconds on low speed to combine. With mixer still on low speed, add butter and remaining ¾ cup milk (gradually); beat 1 minute 30 seconds on medium to aerate and develop structure. Add yolk mixture, in thirds, beating 20 seconds after each addition. Pour into prepared pans and shake pans gently to smooth top.

Bake 25 to 35 minutes, or until a toothpick inserted in the middle comes out clean and the cake springs back when touched lightly. It should not pull away from the sides of the pan until removal from the oven. Allow to cool 10 minutes. Invert onto rack and cool to room temperature before continuing (reinvert to prevent splitting).

Place one cake layer on a plate, then spread with buttercream. Top with second cake layer. On a clean, greased surface and using a greased rolling pin, roll out the fondant to 13 inches. Drape over cake and smooth with greased hands in a circular motion, working from the center out. Cut fondant at the bottom of the cake with a sharp knife.

To color fondant, place in a food processor with coloring. Process until fondant is evenly colored and comes back together to form a mass. Allow to cool slightly before using.